My grandfather was never the most talkative about things native american, but then I only knew him really in high school. But on one occasion the group of us (us being whatever collection of grandkids happened to be around that day) got him talking about how our people lived before contact and in particular the sweat lodges and the morning rituals.
How I remember the story from when I was about 14: All the men and older boys would sleep separately in a sweat lodge. Each morning, the youngest make members of the family would build the fire and heat the stones, then drop them into the water basket to make the sweat lodge hot and steamy. You began the day by sweating and clearing away everything from the previous day and night. After a good sweat, they would go and walk or run into the river adjacent to the village. In winter, if there was ice, they would keep an area broken free so that they could wade into the water and wash away the sweat.
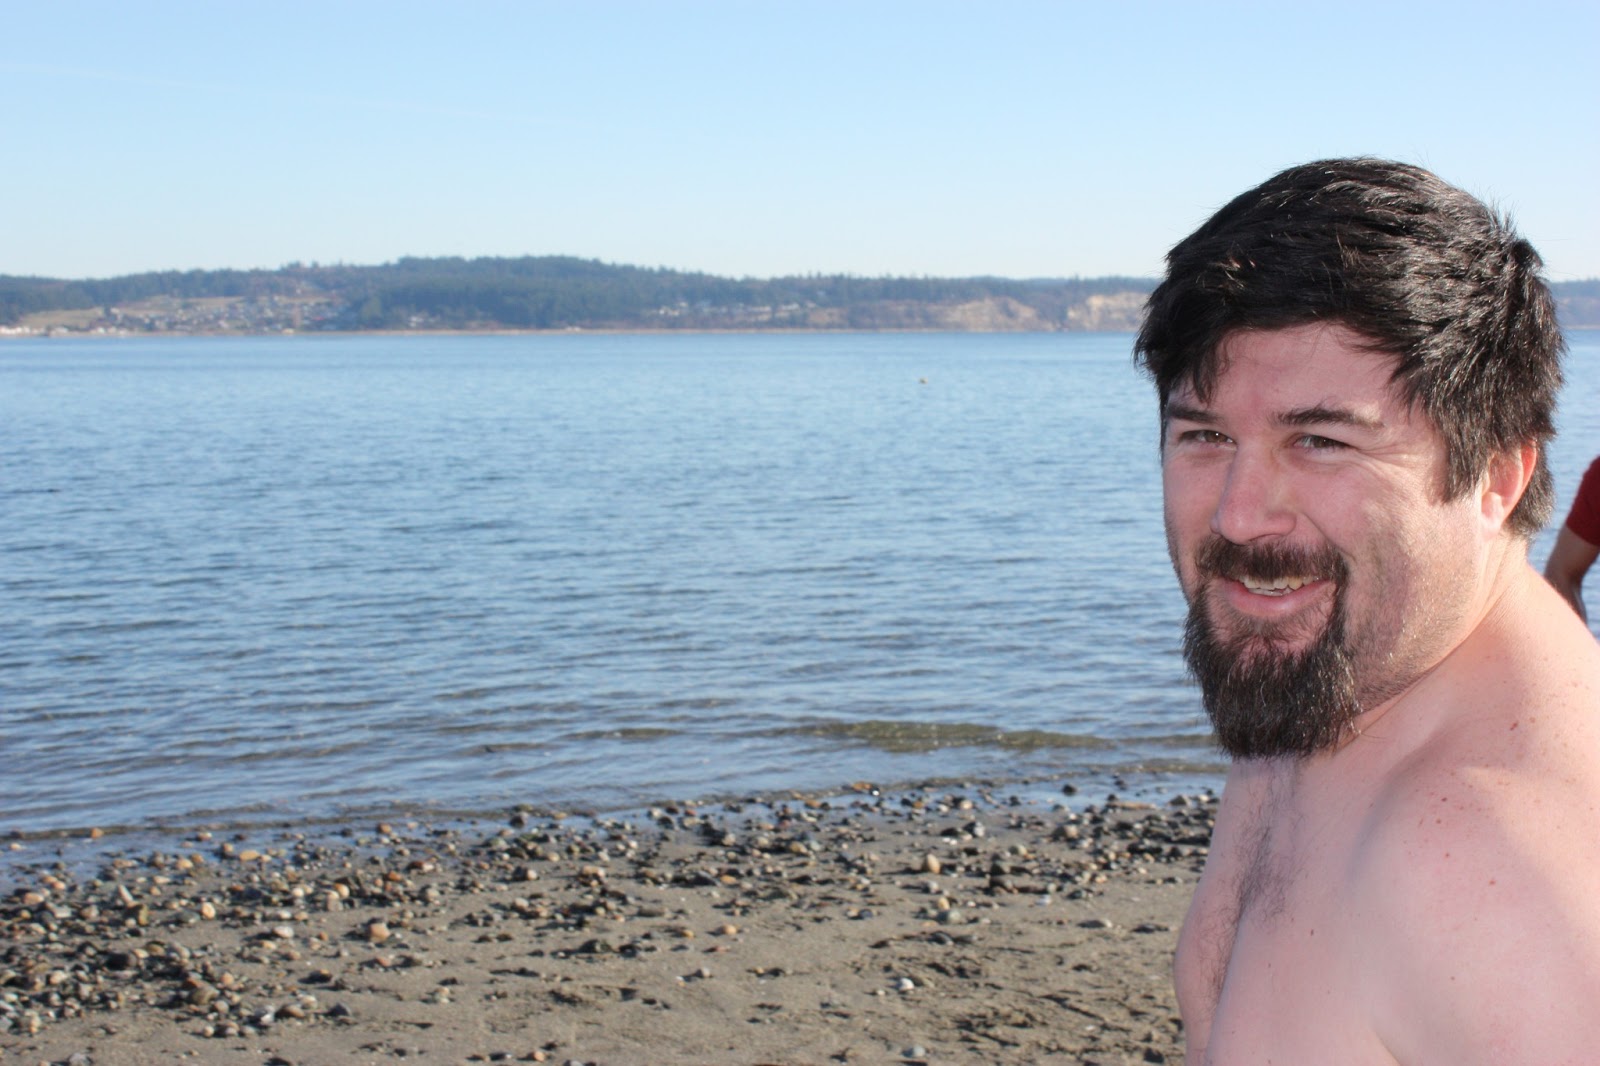
I do not have a sweat lodge, and sleep on cotton sheets, but I have always liked the thought of the plunging into cold water to start the day fresh. Instead, I end up doing that once a year on New Year's Day at a Polar Bear Plunge.
Every year at 12 noon on New Years Day, there is a polar bear plunge at Double Bluff park in Freeland, WA. You donate $15 to the local 4-H, get a free t-shirt, and get to jump into the cold ocean!
A great tradition, and one that I will continue to enjoy, maybe next year one of my boys will join me!
Tuesday, January 22, 2013
Sunday, January 6, 2013
Crab For New Years
It is great to live in the Northwest! There is always something to do outside that I can enjoy with my boys.
On New Years Eve, we decided to take advantage of the last day of crabbing season and throw a pot in from one of the local docks. It was a very nice day, which made this an even better idea! I walked out on the dock and threw the pot into the water while Tracy and the boys played on the beach. We had a great time watching a crew take their crabbing boat out of the water for the winter - a six man operation that took them over an hour to accomplish and involved the realization that their truck was too small.
We checked the pot - a couple starfish and a female dungeness that we threw back. We went to an early lunch at the local pizza joint and checked again - more starfish! REALLY big sunburst starfish, all purple and yellow and slimy with thousands of tentacles trying to get my chicken out of the pot! Carter and Dylan thought this was the greatest catch in the world, letting the little suction tentacles wrap around their fingers before we threw the starfish back into the water.
One last soak while we went home and worked on the garden for a bit, then Carter and I went back out to pull the crab pot. At the end of the dock, Carter got into a conversation with an older gentleman who was also pulling his pots, using his loud four-year-old voice, I could distinctly hear his 1/2 of the conversation as I pulled up a pot of starfish with a last female dungeness.
"We probably only have starfish in our pot, did you catch anything?"
"No, we aren't that good at crabbing, but we like catching starfish."
"Well, my brother is at home sleeping, so he will probably be sad to miss the starfish, but I think he will be OK"
After Carter helped me throw back our unfortunate catch, the older guy came over with a bucket and asked if we wanted his red rock crabs - he had caught four plus some dungeness and "thought Carter needed to bring something home to his brother"
Crab identification Link: Washington Crab Identification
So after a day of poking around with a crab pot, we came home with four red rock crabs, the other other crab of puget sound!
We got home and boiled all four in a nice large pot, then Carter and I sat and ate one together. Dylan even tried a bite, pretty brave for a two-year-old!
After the kids went to bed, I processed the rest of the crabs getting out all the meat. The legs don't have much meat on the red rock crabs, but I am stubborn and still got all everything out. Crab shells and guts went to the compost bin. More food for the worms? Will they eat crab shells? To be determined...
With company coming over the next day, I looked up a crab salad recipe - this definitely worked and was a hit with everybody!
Crab Green Salad with Avacado
Ingredients:
On New Years Eve, we decided to take advantage of the last day of crabbing season and throw a pot in from one of the local docks. It was a very nice day, which made this an even better idea! I walked out on the dock and threw the pot into the water while Tracy and the boys played on the beach. We had a great time watching a crew take their crabbing boat out of the water for the winter - a six man operation that took them over an hour to accomplish and involved the realization that their truck was too small.
We checked the pot - a couple starfish and a female dungeness that we threw back. We went to an early lunch at the local pizza joint and checked again - more starfish! REALLY big sunburst starfish, all purple and yellow and slimy with thousands of tentacles trying to get my chicken out of the pot! Carter and Dylan thought this was the greatest catch in the world, letting the little suction tentacles wrap around their fingers before we threw the starfish back into the water.
One last soak while we went home and worked on the garden for a bit, then Carter and I went back out to pull the crab pot. At the end of the dock, Carter got into a conversation with an older gentleman who was also pulling his pots, using his loud four-year-old voice, I could distinctly hear his 1/2 of the conversation as I pulled up a pot of starfish with a last female dungeness.
"We probably only have starfish in our pot, did you catch anything?"
"No, we aren't that good at crabbing, but we like catching starfish."
"Well, my brother is at home sleeping, so he will probably be sad to miss the starfish, but I think he will be OK"
After Carter helped me throw back our unfortunate catch, the older guy came over with a bucket and asked if we wanted his red rock crabs - he had caught four plus some dungeness and "thought Carter needed to bring something home to his brother"
Crab identification Link: Washington Crab Identification
So after a day of poking around with a crab pot, we came home with four red rock crabs, the other other crab of puget sound!
We got home and boiled all four in a nice large pot, then Carter and I sat and ate one together. Dylan even tried a bite, pretty brave for a two-year-old!
After the kids went to bed, I processed the rest of the crabs getting out all the meat. The legs don't have much meat on the red rock crabs, but I am stubborn and still got all everything out. Crab shells and guts went to the compost bin. More food for the worms? Will they eat crab shells? To be determined...
With company coming over the next day, I looked up a crab salad recipe - this definitely worked and was a hit with everybody!
Crab Green Salad with Avacado
Ingredients:
·
2 cups cooked cooled crab meat, flaked
·
1 cup diced celery
·
1/4 cup chopped green or red bell pepper
·
1 teaspoon salt, or to taste
·
1/4 teaspoon pepper
·
1 tablespoon fresh lemon juice
·
3 tablespoons mayonnaise
·
mixed salad greens
·
6 avocado wedges, optional
Preparation:
Mix
crab meat with diced celery, chopped bell pepper, salt, pepper, lemon juice,
and mayonnaise. Serve over mixed greens with a slice of avocado, if desired.
Till next crab season!
Crabbingi Just Love Crabbing Chefs apron (Google Affiliate Ad)
Till next crab season!
Crabbingi Just Love Crabbing Chefs apron (Google Affiliate Ad)
Tuesday, November 20, 2012
Easy Essentials: Blackberry Jam
I make a lot of different jams, I think over the last couple of years I made 20 different types and by now they have all disappeared except the sour plum jam, so I think they are pretty good. But the staple for my boys is Blackberry Jam. Blackberries are everywhere in abundance, and they are relatively easy to pick. Back when we lived in California, we would go down on the levees and pick buckets full of berries. Walkers and joggers would wander by and look at us like we were crazy or comment on the novelty of someone picking the berries. If we did not get to a patch of berries, they would dry on the vines, too many for even the birds to eat!
Now that we live in the Pacific Northwest, there is a lot more competition for natures bounty. I would go to the end of our driveway where the main road is lined with eight foot tall blackberry brambles on one side before work. At 5-6 AM in the morning, there would be several other people out in the pre-dawn light filling buckets and trying not to tangle themselves in the thorns.
With my fresh picked berries, I follow these steps to produce a consistently perfect jam:
Prepare jars, rings, and lids - each batch will make 4-5 pints of jam. I usually prepare 6 jars in case I miraculously have more than I thought.
Ingredients:
6 cups crushed blackberries
5 cups sugar
1 package pectin (usually SureJell)
1 tablespoon lemon juice
Crush berries - I usually pour berries into a measuring cup then mash them until juicy.
In a large pot, a tall stockpot is best, bring the berries to a boil, stirring constantly
Add sugar and keep stirring until all is melted, bring back to a boil.
Add lemon juice.
Add pectin, keep stirring and bring to a rolling boil.
Boil for 2-4 minutes, this is where a long handled spoon can come in handy!
Done! Ladle into jars, cap, and put into a boiling water canner for 10 minutes.
Enjoy!
Now that we live in the Pacific Northwest, there is a lot more competition for natures bounty. I would go to the end of our driveway where the main road is lined with eight foot tall blackberry brambles on one side before work. At 5-6 AM in the morning, there would be several other people out in the pre-dawn light filling buckets and trying not to tangle themselves in the thorns.
With my fresh picked berries, I follow these steps to produce a consistently perfect jam:
Prepare jars, rings, and lids - each batch will make 4-5 pints of jam. I usually prepare 6 jars in case I miraculously have more than I thought.
Ingredients:
6 cups crushed blackberries
5 cups sugar
1 package pectin (usually SureJell)
1 tablespoon lemon juice
Crush berries - I usually pour berries into a measuring cup then mash them until juicy.
In a large pot, a tall stockpot is best, bring the berries to a boil, stirring constantly
Add sugar and keep stirring until all is melted, bring back to a boil.
Add lemon juice.
Add pectin, keep stirring and bring to a rolling boil.
Boil for 2-4 minutes, this is where a long handled spoon can come in handy!
Done! Ladle into jars, cap, and put into a boiling water canner for 10 minutes.
Enjoy!
Monday, November 19, 2012
Foraging References
I added a new page with references to books on foraging that I have found helpful and informative.
Tuesday, November 6, 2012
Easy Essentials: Homemade Applesauce
Homemade applesauce is one of the easy things to make that can save you money and give you a healthier food for your family. I make the applesauce with skins and all by using a grinder after cooking the apples.
I have planted 10 apple trees on my property, but in the meantime, I have to make do with buying what we need each year. After a trip to Montana, the family stopped at the fruit stand in Thorpe, Washington and I bought a box of Honeycrisp Apples and a box of Granny Smith apples. The Honeycrisp's looked delicious, and the Granny Smiths were on sale!
Leifheit 03018 Apple Slicer And Corer (Google Affiliate Ad)
Unfortunately, my cheapness got the better of me on this occasion. The Honeycrisp's were an excellent apple and sweet, but the Granny Smith apples were too sour and resulted in me having to add sugar to the applesauce. Definitely I will use only sweet apples in the future for making applesauce.
My basic recipe:
Wash the apples.
Slice and core the apples.
Place in a large pot - I use my 30QT stockpot so that I can make a large batch. Add about 1.5 inches of water to the bottom of the pot.
Bring the pot to a boil and let the apples cook until soft - skins and all.
I then use my kitchenaid grinder attachment and put all the apples and sauce through this to grind up the skins.
Add sugar if needed.
Can in a pressure canner at 10 psi for 20 minutes.
I used 30 apples and made 7 quart jars of applesauce. A case of apples resulted in two batches.
What do do with the apples cores? Make apple jelly!
Something to write about another time.
I have planted 10 apple trees on my property, but in the meantime, I have to make do with buying what we need each year. After a trip to Montana, the family stopped at the fruit stand in Thorpe, Washington and I bought a box of Honeycrisp Apples and a box of Granny Smith apples. The Honeycrisp's looked delicious, and the Granny Smiths were on sale!
Leifheit 03018 Apple Slicer And Corer (Google Affiliate Ad)
Unfortunately, my cheapness got the better of me on this occasion. The Honeycrisp's were an excellent apple and sweet, but the Granny Smith apples were too sour and resulted in me having to add sugar to the applesauce. Definitely I will use only sweet apples in the future for making applesauce.
My basic recipe:
Wash the apples.
Slice and core the apples.
Place in a large pot - I use my 30QT stockpot so that I can make a large batch. Add about 1.5 inches of water to the bottom of the pot.
Bring the pot to a boil and let the apples cook until soft - skins and all.
I then use my kitchenaid grinder attachment and put all the apples and sauce through this to grind up the skins.
Add sugar if needed.
Can in a pressure canner at 10 psi for 20 minutes.
I used 30 apples and made 7 quart jars of applesauce. A case of apples resulted in two batches.
![]() |
| starting to cook the apples |
![]() |
| Cooking apples until mushy. |
![]() |
| Kitchenaid grinder. |
![]() |
| Grinding the Applesauce through the kitchenaid grinder. |
![]() |
| Finished Applesauce! |
What do do with the apples cores? Make apple jelly!
Something to write about another time.
Thursday, October 18, 2012
Growing Dry Beans - Heirloom Rockwell Beans
I tried something new in my garden this year, growing dry beans to save for the year. In my area, there is a nice heirloom bean that has been growing here for the last 100 plus years. The Rockwell bean is a small bush bean, similar in size to a pinto bean, that makes excellent baked beans.
I harvested the beans in the first week of October. Simply pulled up the plants and laid them out in my garage to dry for a week.
Ames True American Wood Handle Bow Rake 1849400 (Google Affiliate Ad)After a week, I shelled the beans. They are a cool white and maroon/red color and look perfect for planting next year.
I read some of the stories of the bean:
So after reading about this cool old bean, I bought a package at the farmers market from Willowwood Farms,
I of course tested these out! The recipe was on the back of the label, and made a great baked bean that even my little boys liked!
I kept a handfull of beans and planted them in late may as recommended on several blogs about this bean. Despite several run ins with cut worms and birds eating the sprouts, I ended up getting 12 bushes of beans out the the handfull of beans. They grew very well and produced 3-5 pods with 3-6 beans per pod.
Not the largest harvest in the world, but I am going to save these and plant next year and see what I can do with better planting and plant protection knowledge!
Thursday, October 4, 2012
Nettle Quiche
I am in love with Nettles lately. Maybe because they make themselves very hard not to notice when they are intertwined through our berry bushes all around our property!
In the spirit of using what is available, I decided to utilize the nettles with my abundance of eggs and make nettle quiche for a family breakfast.
I carefully - ie. wearing gloves - collected the tips of some young nettles. I had mowed down a section of nettles on a trail earlier in the year. It is a bit late for young nettle tips where I am at, but where I had knocked them down there were fresh shoots coming back up that I was able to collect.
Still carefully, I put the nettles into a small sauce pan and steamed them for 10 minutes -
![]() |
| Stinging nettle near my house |
I carefully - ie. wearing gloves - collected the tips of some young nettles. I had mowed down a section of nettles on a trail earlier in the year. It is a bit late for young nettle tips where I am at, but where I had knocked them down there were fresh shoots coming back up that I was able to collect.
Still carefully, I put the nettles into a small sauce pan and steamed them for 10 minutes -
I followed a spinach quiche recipe I found online.
And enjoyed!
Subscribe to:
Posts (Atom)